Finally, a nice day. It almost got to 50 degrees here. My husband and I couldn't wait to get out and do something. We were ready for a project. After doing some internet searches last night, we found these plans for a picnic table. We went to the store this morning and $120 and four hours later we were done.


Rough material list:
Material
|
Qty
|
Purpose
|
2" x 6" @ 10'
|
7
|
Legs, bench, and table
top
|
2" x 4" @ 10'
|
1
|
Bench supports (free of
knots)
|
2" x 4" @ 8'
|
2
|
Table top support (right
and left) and misc.
|
5/16" x 4"
Galvanized Carriage Bolts
|
12
|
Bench supports, legs and
diagonal support
|
3" Galvanized Deck
Screws &
2 1/2" Galvanized Deck Screws
|
100+/-
|
Table top, bench seat,
misc. usage
|

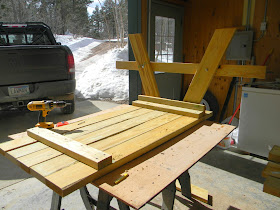
Cut and Assemble the Table Top
- Cut
5 2x6s 60" long out of three of the 10' 2x6s.
- Cut
2 2x4s 28" long out of one of the 8' 2x4s.
- On
a flat surface, lay out the 5 2x6s side by side, with the prettiest side
facing down.
- Position
the two 2x4s on each end of the table top 7.5" from each end.
- Attach the 2x4 braces to the table top boards using two 2.5" galvanized wood screws on each end of each board.
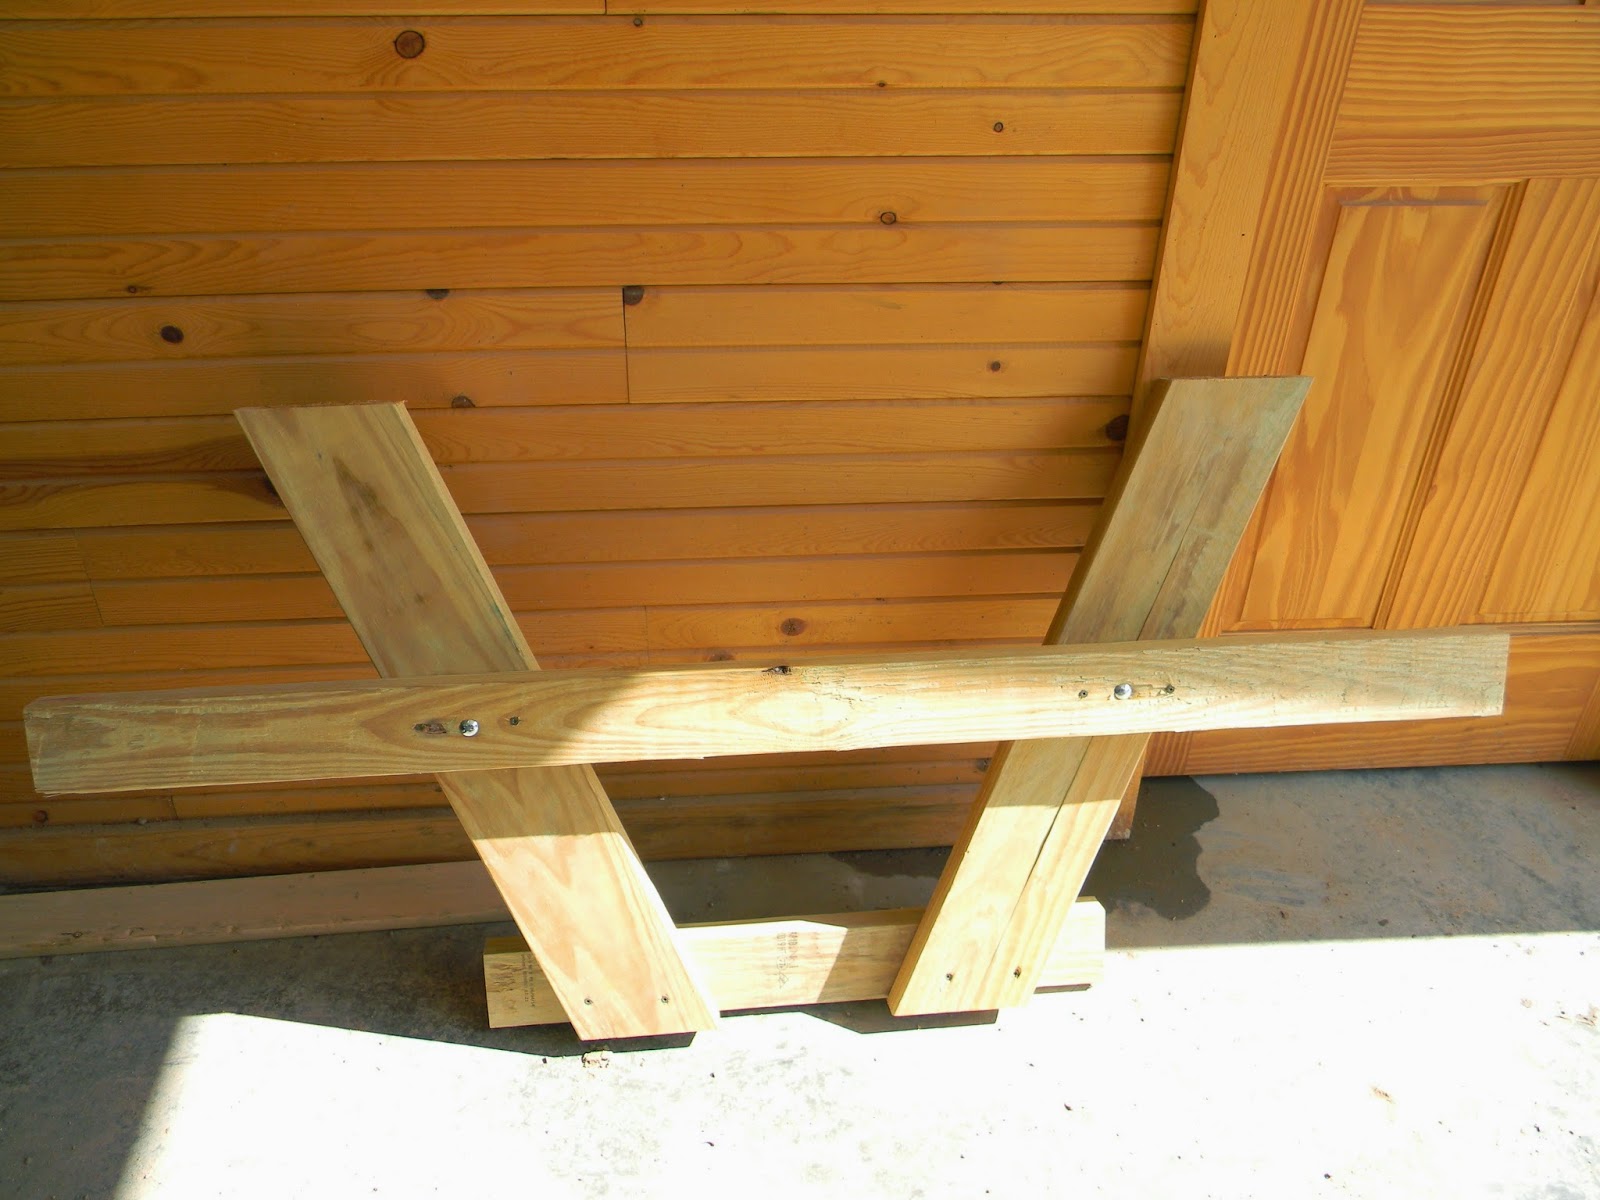
Cut and Assemble the Legs and Bench Supports
- Mark
an angle with a speed square 23 degrees on one end of a 2x6 and cut it.
- Measure
30" from the long point of the previous cut and mark another 23
degree angle and cut it parallel to the first cut.
- From
one of the 8' 2x4s, cut one piece 28" long.
- On
one edge of the 2x4 (A), make a mark 4" from each end. This
will be the position of the top of the legs. (see diagram)
- Place
the legs (B) on the 2x4 (A) as shown in the diagram, and secure them with
two 2.5" galvanized wood screws.
- From
the 10' 2x4, cut two pieces 60" long. These will be used for
the bench supports.
- Measure
up 14.5" from the other end of each leg and make a mark. This
will be the height of the bench support.
- Line
up the top of the 60" bench support with the marks made from the
previous step.
- Center
it between the legs so that an equal amount of 2x4 is extending from each
side. (see the diagram below).
- Secure
the bench support (C) to the legs (B) with two 2.5" galvanized wood
screws.
- Drill
a 3/8" hole through both boards where each piece connects, and secure
the pieces together with four 3/8" x 4" carriage bolts.
Note that the holes that secure the legs (B) to the upper support (A)
should be drilled 2" from the top of the upper support (1.5"
from the bottom). This is so that when you attach the leg assembly
to the table top, the carriage bolts won't be in the way.
- Repeat the steps above to assemble the remaining leg assembly.

Attach the Leg Sections to
the Table Top
- Flip
the table top upside down and attach the legs to each side of the table
top braces. Use four 2.5" galvanized wood screws to secure each
leg section.
- From
the remaining 8' 2x4, cut two 24" pieces with a 45 degree bevel on
each end. These will be used as braces.
- From
the bottom of the table top to the bench support, make a mark at 17"
on the middle of the bench support.
- Make
another mark on the underside of the table from the inside plane of the
bench support to the center board on the underside of the table (see
diagram). The 24" brace, when attached, should line up with
these two marks. If they don't, pull the leg assembly over until the
marks line up. This is required so that the legs and table top will
be a perfect 90 degrees.
- Secure
the braces with 2.5" galvanized wood screws and finally, with
carriage bolts.

Finishing Up
With the diagonal braces in place and secured, flip the table
upright and add the 60" 2x6 bench seats. (see diagrams) Using the
remaining scrap 2x material, add supports to the middle of the table top and
middle of the bench seats to keep the lined up. (see the Picnic Table
Side View)
Cut theses braces so that they are about 1" from either edge
of the table top or bench seat. Secure them with 2.5" galvanized
wood screws.
We got the plans at:
http://www.mycarpentry.com/picnic-table-designs.html
Just know that it forgets to tell you to buy the 2 1/2" galvanized wood screws. Not something you want to realize after you get home from getting materials.
Yes, we probably could have just purchased a table, but what fun would that be? All that left is sanding and staining. Oh, and some summertime.
that looks a lot better built than the ones you buy in the stores. Could you send some nice weather up our way please!!
ReplyDeleteGillian in Southern Ontario
Meals taste better outdoors. What a nice plan and a sturdy one. What's for dinner?
ReplyDeleteThat is really nice, I would love to have one too and then put it in the yard with one of those small grills that state parks have so you could cook your burgers or dogs and have your own picnic spot. You will have fun with it.
ReplyDeleteExactly! Sitting at a handmade table makes totally different experience. And it looks brilliant!
ReplyDeleteThat is a lovely table!! What a nice project. I can tell you are getting ready for spring.
ReplyDeleteNice job! When's the first picnic?
ReplyDeleteWhat a great project and such a cute picture of you and your husband!!
ReplyDeleteI'm passing this project idea on to my husband. I am planning on getting a jump on spring, no reason he can't as well!
ReplyDeleteChristine in Alaska, no spring yet
Great looking finished product! Folks sell these on craigslist here for upwards $400. You could start your own side business :)
ReplyDelete